
Review · CYCLING TOURS
Geiranger: Sky to Fjord Downhill Biking Adventure
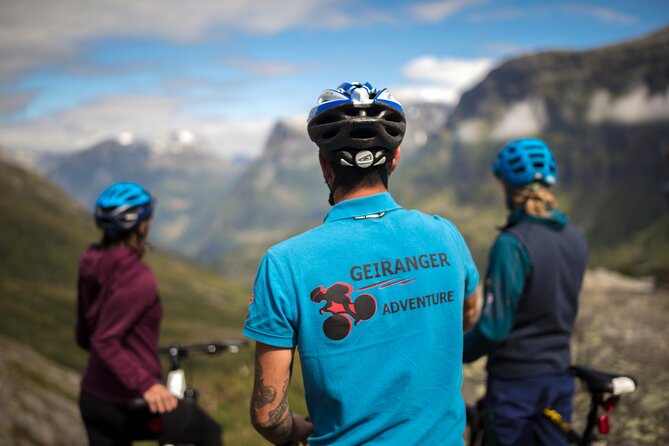
A fjord road ride you can feel. This is a high-adrenaline downhill biking session with serious scenery, powered by a comfortable air-conditioned transfer and a simple setup at the top. What I like most is the chance to mix speed with multiple classic photo stops, and the fact that your safety basics, bike, helmet, gloves, and vest, are included. One thing to consider up front: the ride is unguided, so you need to be ready to follow the safety instructions and pace yourself with traffic around you.
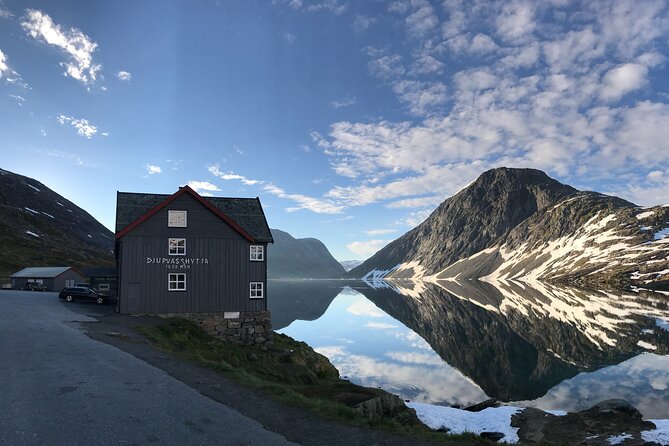
You start high up at Djupvatn Lake (1030 m above sea level) and coast down about 16 km, with a handful of named viewpoints along the way. The whole experience takes roughly 2 hours 30 minutes, and the group size stays small, with a maximum of 6 riders. The best part is that you can stop and look longer, because you are not tied to a tight guided script.
This is an activity for people with at least moderate physical fitness. You should also plan for weather, because the tour requires good conditions to run.
In This Review
- Key Things to Know Before You Roll
- The Sky to Fjord Thrill: Why This Ride Works
- Getting From Geiranger to the Start Point Without Hassle
- The Setup: Equipment, Instructions, and What to Check First
- Riding the 16 km Downhill: What It Feels Like
- Stop by Stop: Fjord Views at Flydalsjuvet, Blåfjell, and More
- Flydalsjuvet
- The foot of Blåfjell mountain viewpoint
- Kvandalls waterfall
- Opplenskedalen Valley
- Knuten
- Going Unguided: Freedom With a Safety Net
- Price and Value: Is $160.09 Worth It?
- Timing, Weather, and How to Plan Your Day in Geiranger
- Who This Tour Suits Best (And Who Should Rethink It)
- Should You Book Sky to Fjord Downhill Biking in Geiranger?
- FAQ
- Is there a guide on the downhill ride?
- What equipment is included?
- How long is the biking adventure?
- How much biking distance is included?
- What fitness level do I need?
- What if the weather is bad?
Key Things to Know Before You Roll
- Small group max 6: You get less crowd pressure and more freedom to stop for photos.
- 16 km downhill from Djupvatn Lake: You are riding the drop, not a long training session.
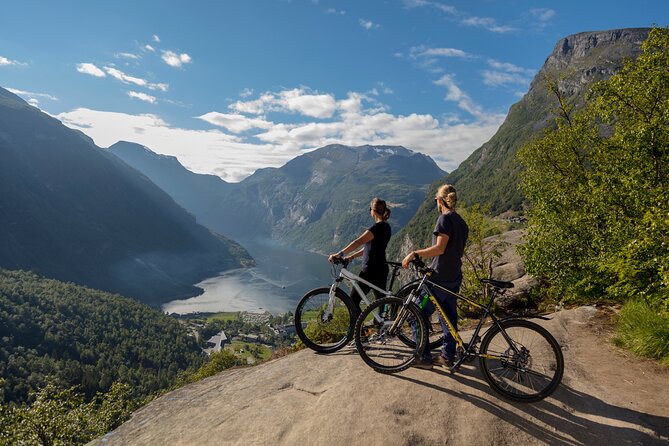
- Multiple named stops: Flydalsjuvet plus viewpoints for Blåfjell, Kvandalls waterfall, Opplenskedalen Valley, and Knuten.
- Safety gear is included: Helmet, gloves, and a visibility vest, plus a vest and bike suited to downhill use.
- Unguided ride means self-managing: You’ll get instructions, then you’re on your own.
The Sky to Fjord Thrill: Why This Ride Works
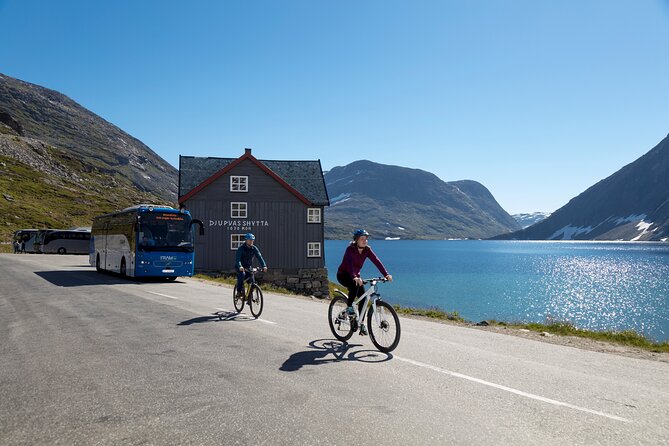
This is one of those Norway experiences where the scenery is not just background. The road drops away, the fjord views open up, and you get the feeling of moving through the landscape instead of touring it from a bus window. You’re also not stuck doing just one viewpoint and calling it done. Instead, you cruise down with several stopping points that make the ride feel like a sequence, not a single sprint.
The other big reason this works is the balance between structure and freedom. You’re transported up in a vehicle, equipped with safety gear, and given technical and safety instructions before you start. After that, you control your pace and your photo stops. That rhythm is what turns a 2.5-hour activity into a real memory.
More Bike Tours in Åndalsnes:
- E-Bike Tour in Geiranger
★ 4.5 · 6 reviews - E-bike and hike in Åndalsnes
★ 5.0 · 4 reviews - Andalsnes: Bike & Hike Adventure to Litlefjellet Summit
★ 5.0 · 3 reviews
Getting From Geiranger to the Start Point Without Hassle
Your meeting point is Geirangervegen 10, right in the Geiranger area. You stay there for pickup, then the team drives you up to the start at Djupvatn Lake, 1030 m above sea level. That transfer matters more than it sounds. It saves you from the hardest part of the day, and it also sets you up for a smoother ride because you begin where the downhill actually starts.
You ride in an air-conditioned vehicle, which is a nice touch in a country where weather can still feel changeable. It also keeps the day from becoming logistics-heavy, which is important if you’re visiting Norway on a cruise or tight schedule.
Group size is capped at 6. That small number tends to make the setup feel faster and calmer, especially when equipment checks and seat adjustments need to happen before you roll.
The Setup: Equipment, Instructions, and What to Check First
The included gear list is straightforward: a downhill bike, a helmet, bicycle gloves, and a visibility vest. You should view that as a baseline, not a guarantee that everything will feel perfect for your body. One downside that shows up in the mix is that a few people have had issues with equipment condition or fit. So I recommend you handle this like a safety-conscious checklist, not a hope-and-pray situation.
Before you start, take 60 seconds to:
- Confirm the helmet straps fit securely and comfortably
- Check that you can reach the controls without stretching
- Make sure your seat height feels stable (not too low or too far forward)
- Test braking early, not at the last second
You’ll also receive technical and safety instructions from the team. Because the ride itself is unguided, this is your main moment to get comfortable with how the bike behaves, how to manage speed, and where you should pay attention.
Riding the 16 km Downhill: What It Feels Like
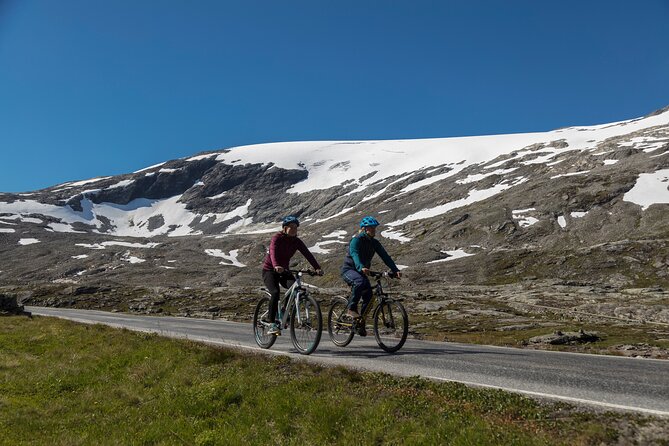
The downhill distance is about 16 km, and the route is designed so you are spending most of the time coasting and letting gravity do the work. Even so, it is not a zero-effort ride. There can be a short section where you may need to pedal slightly uphill, and in at least some conditions or rider situations, people choose to walk that part instead.
Here’s why that matters for planning. If you arrive thinking it’s a full-on adrenaline rocket the entire way, you might be surprised by brief rhythm changes. But if you arrive with the mindset that it’s mostly downhill with a couple of small reality checks, it becomes much more enjoyable.
Also, because it’s taken on a public road, expect traffic to be a factor. Some riders have pointed out that there may not be a shoulder or a separate bike path, so buses and cars can be very close. That is not meant to scare you off. It simply means you should ride defensively, keep your stops planned, and do not treat this like a secluded trail.
A few more Åndalsnes days worth weighing up
- Geiranger Shore Excursion: Mt. Dalsnibba and Eagle Road
★ 4.5 · 718 reviews - Geiranger: RIB Fjordsafari Geirangefjord
★ 4.5 · 651 reviews - From Ålesund: Trollstigen Sightseeing Village & Fjord Tour
★ 4.4 · 651 reviews - Guided Boat Tour in Geiranger
★ 4.5 · 147 reviews
Stop by Stop: Fjord Views at Flydalsjuvet, Blåfjell, and More
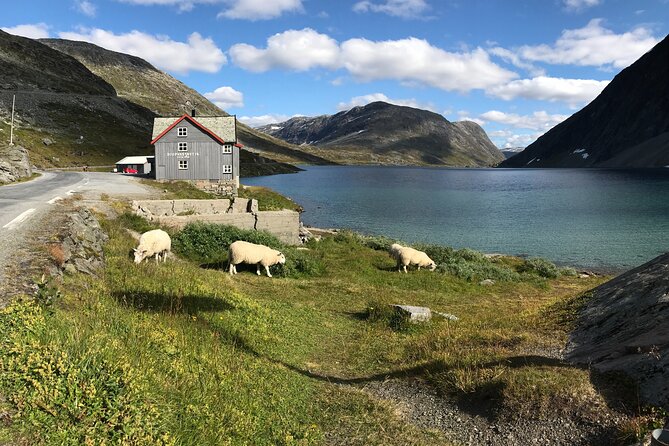
You’ll have multiple chances to stop at some of Norway’s best-known scenic spots along the descent. The experience highlights several named viewpoints, and you are meant to use them. Take your time. The best photos here come when you actually pause long enough to look.
Flydalsjuvet
Flydalsjuvet is the big name stop and is listed as your first stop. This is the moment many people associate with the entire ride. You get an intense view of the fjord and the dramatic drop-offs that make this region famous. If you only have energy for one stop, this is the one to prioritize.
Practical tip: take photos slowly. If you stop suddenly while rolling, you’ll feel rushed by passing vehicles. Pull in where you can, get your shots, and then move back onto the bike smoothly.
The foot of Blåfjell mountain viewpoint
Next are viewpoint moments tied to the foot of Blåfjell mountain. This section helps the ride feel like more than one cliff. You get changes in perspective as the road drops and the valley opens up.
This stop is also a good time to check your bike one last time. It’s not about problems. It’s about confirming you’re comfortable with your braking and posture before the later stages.
Kvandalls waterfall
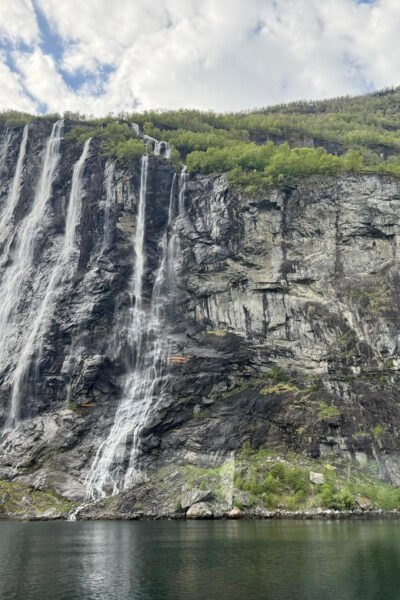
The Kvandalls waterfall stop gives you the mix people love most in Norway, water and mountains at the same time. It breaks up the pure “look outward” theme and adds a fresh element you can photograph close up.
If you’re photographing, keep your camera hand ready but your body balanced. People often lean too far forward trying to frame shots, then wonder why the bike feels twitchy once they mount again.
Opplenskedalen Valley
Opplenskedalen Valley offers a longer view angle, which helps you understand the geography. Instead of just staring at one point, you start to read the shape of the land.
This stop is ideal for slow riders. If you like to stretch out your day, this is where you can without feeling like you’re falling behind.
Knuten
Knuten rounds out the set of classic viewpoint stops. It adds another perspective before the descent ends and you return back down to Geiranger.
Going Unguided: Freedom With a Safety Net
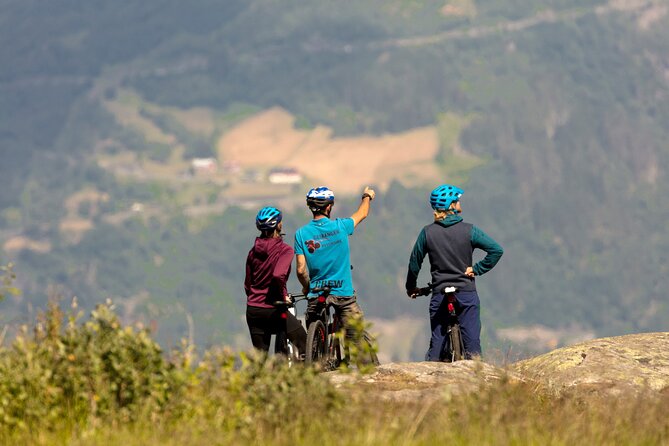
This part is important. Guiding is not included, which means once you start, you’re responsible for managing the ride on your own. The good news is that the team does not just hand you a bike and hope you figure it out. You get technical and safety instructions and tips before you begin.
The value of unguided here is simple: you can stop whenever you want for photos, and you can ride at your own pace. People also mention that this kind of timing works well even if your riding confidence is not high. The ride is described as manageable for different ability levels, with only a small uphill section possible.
The caution is just practical. Ride like you share the road, and ride like the weather or road surface could shift. Keep your stops purposeful, and do not get distracted trying to capture the perfect shot while you are still moving.
Price and Value: Is $160.09 Worth It?
At $160.09 per person, this is not a budget activity. So the question is value for what you actually get.
Here’s what you’re paying for:
- A pre-arranged uphill transfer to Djupvatn Lake
- Downhill-ready biking gear (bike, helmet, gloves, visibility vest)
- Technical and safety instructions
- A scenic descent built around several recognized viewpoint stops
- A small group limit (max 6)
For me, the biggest value driver is the pairing of included equipment and the effort you skip. Without this setup, you would still have to arrange transport up the mountain, deal with bike rental, and figure out where to stop on a long public road while managing your own safety. This tour compresses all of that into roughly 2.5 hours.
The likely value mismatch comes if you are expecting a fully guided, commentary-heavy tour. This ride focuses on the downhill and the scenery, not on a guide rolling beside you every minute. If that’s what you want, you might feel it’s expensive for a ride-and-go format.
Timing, Weather, and How to Plan Your Day in Geiranger
This experience runs only when conditions are good. That matters because a downhill bike ride is more sensitive to weather and road conditions than a walking tour. If the day turns messy, you can be offered another date or a refund.
Aim to build in some flexibility. In fjord country, weather can change quickly. If you’re on a cruise day, it’s smart to leave enough buffer so you can take the ride when the conditions are right.
Duration is listed at about 2 hours 30 minutes. That usually fits well into a half-day block, especially if you want this as your main activity rather than stacking several major stops back to back.
Who This Tour Suits Best (And Who Should Rethink It)
This is a strong fit if:
- You want adrenaline without a technical bike park
- You like stopping for photos at your own pace
- You can handle a mostly downhill route with the possibility of a short uphill pedal or a short walk
- You’re comfortable riding on a public road with traffic nearby
You might think twice if:
- You want a fully guided experience with constant commentary and a rider assistant throughout
- You are very sensitive to road conditions or you prefer wide shoulders or protected bike lanes
- You’re expecting a slow, leisurely stroll instead of a true downhill ride
Also, plan for moderate physical fitness. That does not mean you need to be an athlete. It means you should be able to manage transitions on and off the bike and handle brief changes in effort.
Should You Book Sky to Fjord Downhill Biking in Geiranger?
I’d book it if you want the kind of Norway experience where the views come with motion and you get to control your photo stops. The combination of included gear, a short timeline (about 2.5 hours), and multiple named viewpoints makes it feel like more than just transportation to a viewpoint.
If you do book, do the one thing that protects your whole day: spend a minute on fit and safety checks before you roll. Then ride defensively on the public road, plan your stops, and take Flydalsjuvet seriously, because it sets the tone for the entire descent.
If you tell me your travel month and whether you’re arriving by cruise or on your own, I can suggest the best way to pair this with other Geiranger highlights.
FAQ
Is there a guide on the downhill ride?
No. The downhill ride happens without the presence of a guide. You get technical and safety instructions before you start.
What equipment is included?
Your included equipment is the bike, a helmet, bicycle gloves, and a visibility vest.
How long is the biking adventure?
The duration is about 2 hours 30 minutes (approx.).
How much biking distance is included?
On the way down, you cover about 16 km, starting from Djupvatn Lake at 1030 m above sea level.
What fitness level do I need?
You should have a moderate physical fitness level.
What if the weather is bad?
This experience requires good weather. If it is canceled due to poor weather, you will be offered a different date or a full refund.
Recently added around Åndalsnes
- 3-Hour Kayak Tour in Åndalsnes★ 5.0 · 6 reviews
- The Golden Train on Rauma Railway in Romsdalen★ 4.5 · 21 reviews
- Via Ferrata Åndalsnes West Wall★ 5.0 · 65 reviews
- 2-Hour Guided Kayak Experience in Geiranger★ 4.5 · 14 reviews
- Kayak Tour with Waterfall Views in Geiranger★ 4.5 · 45 reviews
- Geiranger by Royal route, 5 hours with visiting a high-mountain farm★ 5.0 · 3 reviews
- Geiranger: Excursions.no Geiranger Highlights★ 3.5 · 19 reviews
- Private tour Geiranger and Glaciers 1 to 15 people★ 5.0 · 4 reviews
Cycling Tours, compared.
Guided EL-Bike tour in the city of Haugesund and Coastal path
Read our review →
Guided E-Bike Tour in Haugesund: city, vikings, Rising Tides
Read our review →
Browse the lists this tour appears in